

Vari Electric Standing Desk Review – 1 Year Later


DISCLAIMER: This is not a sponsored post, I bought this desk with my own money. I may earn revenue from purchases made through affiliate links in this review.
It’s been over a year since I purchased the Vari Electric Standing Desk and I’d like to share an update.
First and foremost, this desk has made a huge improvement in my overall health and wellbeing. The constant back pain I used to have is pretty much gone.
Any time I get uncomfortable, I just change positions. (Right now I am standing to write this post after having been sitting for an hour.)
Avoiding discomfort makes me happier and more motivated to work. I only wish I had invested in a desk like this years ago. I know a desk isn’t as fun as a new computer or other gear, but in retrospect, the desk should have taken priority over a lot of other gear I bought that I don’t even use now.
My only regrets are that I wish I had purchased the wider version. I have a lot of gear on the 48″ version and it feel a bit crowded. I do think the 48″ version fits better in the small space I have though.
It’s a minor gripe, but I would have preferred a desk with an automatic lift. I have to hold the button down to move the desk up or down.
Do yourself a favor and get a standing desk like this. This is the Vari Electric Standing Desk, but there are dozens of other manufacturers who make essentially the same thing. I can’t speak for the quality of those brands, but I’m happy with my purchase from Varidesk.

Check out my full video review of the Vari Electric Standing Desk
Wacom Cintiq Pro 16 (2021) Review

Today, I’m reviewing the 2021 version of the Wacom Cintiq Pro 16. This is a top-of-the-line graphics tablet with a built in display you can draw directly onto.
In this review, I’ll explain the new features and I’ll give you my overall opinion of the device.
Disclaimer:
Wacom sent me this device unconditionally for review purposes. I may earn commission from purchases made through affiliate links in this article. All opinions in this review are my own.
The 2021 version of the Cintiq Pro 16 is a refresh of the previous generation which was released around 2016 or so. Wacom took a lot of the feedback from users and used it to improve upon the device. Let’s start with a quick overview of the key features that have not changed since 2016:

Overview of Specs
- The 2021 Cintiq Pro 16 still has a 4K Resolution
- It comes with the Pro Pen 2 which features 8192 Pressure Levels
- You can also use other Wacom Pens like Pro Pen Slim or Art Pen which supports barrel Rotation
- The display is made from Etched Glass with Optical Bonding to greatly reduce parallax
- There is a Kensington mini lock slot
- And the device is compatible with both PC and Mac
Accessories Included
The accessories included are:
- One USB-A to USB-C cable
- One USB-C to USB-C cable
- One HDMI cable
- 1 Power Brick and Power Cable
The cables are not super long, but long enough to connect to a desktop that is very near your desk. Most certainly, it will do for a laptop. But if you use use a standing desk like I do, you may want to pick up some longer cables from the thrift store.
While I like the design aesthetic and convenience of Wacom’s all-in-one cables, once you break one, the attraction fades. I broke the HDMI connection on the cable to my Wacom One, it was completely my fault, and I had to replace the entire cable rather than replacing just the HDMI cable. So, although they are not as tidy, I think the individual non-proprietary cables are less wasteful.
This tablet also comes with instructions, 2 year warranty in the US, and a weighted pen stand which can be opened to reveal 6 additional standard nibs and 4 felt nibs which have more of a marker feel to them. (With the one in the pen, that’s a total of 14 nibs.)
What’s New Compared to the Older Version

The build, weight and size are all about the same. So as you can see, the core features of this device are pretty much unchanged. Now let’s look at what’s new:
Express Keys
The most noticeable new feature are the (8) Express Keys are included on this model. Located on the back of the tablet, there are 4 buttons on each side. These buttons can be programmed to activate shortcuts and other commands.

The idea here is to allow you to press the keys where your hands will be holding the tablet.
Personally, I find the buttons to be in kind of an awkward position. I’m struggling to understand how this is ergonomic. The keys are too close to the edge, which doesn’t feel like it would be a very comfortable hand position long-term. As you can see, the legs prevent the keys from moving any farther in, so I’d move the Express Keys down a bit and then over toward the back. I’d make them flat but maybe a bit inset like the keys on the Intuos.

If you just pinch one key at a time, the placement isn’t too bad. But my second gripe is that you have to feel the buttons (which isn’t difficult because they are elevated quite far off the surface) but that means you need to keep all 4 fingers there.
If the Express Keys have to be on the very edge of the tablet, then there really should be some LED or at least markings on the side of the tablet to show you where each key is so you don’t have to rely on feel. You could put a few stickers on there yourself I suppose.
That’s not to mention that it’s impossible to have your hands on all 8 keys while simultaneously drawing on the tablet. Although, you can still press the keys while holding the pen.
If you need more than 8 buttons, you can purchase the optional Wacom Express Key Remote. There’s no way to dock it to the Cintiq Pro 16. but I’d recommend upgrading to the remote. I think these Express Keys are a little too clunky for my taste but better than nothing and certainly useful for invoking Display Toggle and On-Screen Keys.
Pen Holder
The location and style of the pen holder has been changed. Instead of being located on the top of the tablet, it’s now on the sides. You can move the holder to either side depending on your handedness.
Although, the holder does block the Express Keys a bit. Not as much when the pen is removed. but If I were using the Express Keys often, I wouldn’t have the holder attached.

Rather than the plastic and metal pen holder that was on the previous generation, this one is a fabric sleeve with an attached nib holder hiding 3 spare nibs. This is the same pen holder you see on the non-pro Cintiq 16 and 22.
Improved Multi-Touch
I’m pleased to see a refresh of the multi-touch on Wacom’s devices.
Touch has come a long way. Early multi-touch was very inconsistent and I would rarely use it. The Cintiq 27 QHD I use currently has pretty decent touch. However it does glitch out sometimes, so I usually keep it disabled until I need it.

I haven’t tested it extensively, but the new multi-touch feels much more responsive. The motion appears smoother and the movement of the canvas is less choppy.
Panning and zooming feel much improved, but rotation feels a lot different. I’m used to using one hand to rotate, but it feels like it now takes repeated gestures to get a full rotation. However, if I use two hands, it rotates very smoothly.
If this is how it is, I can probably get used to it, but what I would prefer is a more sensitive rotation or at least a setting to control rotation sensitivity so that I can make it feel more responsive.
In the Wacom Tablet Properties, there is also an option to use Wacom or Windows Gestures.
Touch Switch
The Cintiq Pro 16 features a physical switch on the top-edge of the bezel for enabling and disabling multi-touch. There is a bit of a delay so the switch just triggers the Touch On/Off command like an Express Key would.

Once you do this, the Wacom Tablet Properties give you the option to either Disable All Touch Input, or Disable Touch Input except for On-Screen Controls. On-Screen Controls are buttons that are on-screen rather than physical.
This switch is a nice addition because then you don’t have to waste an Express Key on that function.
More-Accurate Color
The Wacom Cintiq Pro 16 is slightly brighter and more color accurate than its predecessor at 98% of Adobe RGB. This puts in on-par with the larger Cintiq Pros.
Display Connection
The Cintiq Pro 16 can be connected as a display through HDMI, or USB-C, if your computer supports DisplayPort Alt Mode or Thunderbolt 3. The USB-C connection only requires a single USB-C cable.

If you are connecting the display through HDMI, you’ll also need to connect an additional USB-A or USB-C cable for the data transmission. My computer was a little picky about which USB port I used, but I got it working. (Don’t use a USB Hub.)
Unfortunately, you cannot both power the Cintiq and display video with a single USB-C cable.
No Wacom Link or Adapters are included, but you can for example, use an adapter to convert DVI to HDMI. Although, that may reduce the display resolution to 2560×1440 or lower. I had to make sure to connect directly to HDMI on my video card to get the full 4K resolution. HDMI 2.0 or later is required for 4K.
Stand
The Wacom Cintiq Pro 16 has built-in folding legs that put the tablet at a slight 20 degree incline. I happen to prefer drawing with my tablet more upright, so these legs never quite do it for me.

VESA Mount
One of the small features that I’m really happy to see is the VESA mounting holes on the back of the device. This allows you to attach your display to a monitor arm like an Ergotron.

The older generation lacked this feature and instead had a clunky 3 position stand. I recall dozens of people selling their own sketchy-looking hand-made VESA mounting systems.
Wacom offers an optional adjustable stand for the Cintiq Pro 16 which connects to the VESA mount. I’d go ahead an pick that up if you don’t like hunching over while drawing.
PVC-Free Cables
And the last new feature I will mention is that the cables do not contain PVC. Because we need to conserve that for pants… You know, because of Covid.
But PVC is also harmful to the environment.
Drawing Experience
Now that we’ve looked at all of the features, let’s see how the device performs for digital art.
For the most part, you can expect that a Wacom Pro Pen 2 is going to perform pretty much the same across any of the devices that support it. For example, the lines I draw are not going to be unintentionally wobbly.
Unlike many of their competitors, Wacom’s not wasting anyone’s time with a sub-par pen and drawing experience. And as a reviewer, I appreciate when things just work right out of the box.

One thing that is sort of drawing related is the noise that the fans make. They are definitely audible compared to my Cintiq 27 QHD Touch, which is near silent. Something about these newer Cintiq Pros are noisier and I don’t like that as someone who records what I am drawing.
Price & Alternatives
The Cintiq Pro 16 is $1,4999.95.
If that sounds outside of your price range, you can get a display tablet like this for far less than $1500. The Wacom One is only $399. And although it has fewer features and a smaller display, it still offers a great on-screen drawing experience.
At $1,199, there is also the Cintiq 22 which is quite a bit larger. and it comes with an adjustable stand. Although the screen resolution is lower at only 1080p.
I’ll discuss some of the differences between the Cintiq Pro and the non-Pro models in just a bit.

If you want to spend a bit more for a larger display, you can get the non-touch version of the Cintiq Pro 24 for $1,999.95. But then you are probably going to want an Ergotron Arm or a stand which can be another $200 or $500 on top of that.
I don’t know if there will eventually be a 13 inch model of the Cintiq Pro like there was with the previous generation, but that could be a bit cheaper as well.
Who Is It For?
So who is the Cintiq Pro 16 for?
Ultimately, I think it just comes down to size preference. The price of the Cintiq Pro 16 is probably overkill for most hobbyists, so it will most likely be professionals buying this.
If you want the best display tablet on the market, but don’t have the desk space for one of the larger Cintiq Pros, then this is the next best option. It really does look and feel like the larger Cintiq Pros, only smaller.

Just as well, if you are a student and you want the same quality device as the industry professionals use, the Cintiq Pros will give you the same performance at home as you are used to at school.
Compared to Cintiq 16 and 22
Wacom has some confusing product names. So I don’t blame you if you get the Cintiq Pro 16 mixed up with the regular ol’ Cintiq 16. So next, I’ll quickly list some of the key differences between the Pro and non-Pro Cintiq 16 and 22:

The Pro version of the Wacom Cintiq 16 has a higher display resolution, more accurate color representation, built-in Express Keys, multi-touch, an etched glass surface, and it can be connected to your computer through USB-C in addition to HDMI.
The only advantage the Cintiq 16 has over the Pro 16 is that it has better protection for the cables where they attach to the display. There is a little compartment you have to open which keeps the cables from getting broken at the connection points.

The cables on the Pro 16 feel like they are attached firmly, but they do wiggle a bit.
I’m sure the compartment was probably scrapped in order to make the design thinner. Plus the compartment makes it more time-consuming to take apart if you want to your tablet to be portable.
Both the Cintiq 16 and the Cintiq Pro 16 have folding legs. But as I mentioned earlier, the Cintiq 22 comes with the built in stand.
Clues About Next Generation Cintiq 24 & 32
Before I wrap up this review, I think it would be fun to speculate on what clues the updates to the Wacom Cintiq Pro 16 might give us to the next generation of larger Cintiq Pro 24 and 32s.
For the record, I don’t have any insider information about upcoming Wacom products. I’m just making educated guesses.
At first, I was expecting the refreshed Cintiq Pro 16 would feature an 8K resolution. This signaled to me that perhaps the next large-format Cintiq Pros are either not going to be 8K, or they aren’t coming for a while longer. (There was about a 2 year gap between the first generation Cintiq Pro 16 and the Cintiq Pro 24. And that was before all of the worldwide supply chain issues we are having now.)

But as my eyes were struggling to see much of a difference between HD and 4K on such a small screen, I realized that 8K would be overkill for a small 16 inch screen like this. So perhaps we will see a Cintiq 24 or 32 with an 8K display since you can better appreciate the resolution at larger scales. (Even better would be a 27 inch model.)
A higher resolution certainly would be a feature that would differentiate the larger Cintiq Pros from the smaller ones.
What seems the least likely is that there will be a similar refresh of the larger Cintiq Pros. I can’t see built-in Express Keys as being much of a reason to upgrade since the Express Key Remote is a better option and it is included with the current Cintiq Pro 24 and 32. Improved multi-touch would be welcome, but most everything else that was added to the refreshed Cintiq Pro 16 already exists in the current Cintiq Pro 24 and 32.
Conclusion
While it’s not as substantial of an upgrade as I had initially expected, I think it’s great that Wacom has used user feedback to improve upon the design of the Cintiq Pro 16. If you’re looking for a top-of-the-line 16 inch display tablet, I highly recommend the Cintiq Pro 16.
⭐ For more drawing tablet reviews, be sure to subscribe to my channel and enable notifications.
Pastel Network Review

If you’re like me, you want to have success selling your digital art NFTs, but you’ve found that barriers like Ethereum gas fees are keeping you from getting beyond testing the waters. In this review, I will introduce you to what could just be a better, user-first way of creating digital art NFTs, that just about any artist can take advantage of.
Quick disclaimer: This review is intended to introduce you to the Pastel Network, but is not meant to be investment advice. This review is sponsored by Pastel. As always, all opinions in this review are my own.
What is Pastel?
First, what is Pastel? Pastel is the world’s most advanced, secure, and decentralized blockchain for NFTs. Pastel’s network and platform are fully dedicated to the creation, validation, storage and exchange of provably-rare digital assets.

In order to understand what all of that means, we need to explore the current NFT creation ecosystem.
What Are the Barriers of Buying and Selling Digital Art NFTs?
If you’ve tried to create an NFT in 2021, you’ve likely been discouraged by a few of the barriers to entry such as: the excessive gas fees to mint an NFT, the security of blockchain transactions, the environmental impact of cryptocurrencies, the integrity of NFTs over time, and the authenticity of rare assets.
That’s not to mention all of the prerequisite stuff you have to learn to even get set up with a wallet and purchase some Ethereum.
Gas Fees
Let’s start by addressing the biggest turn off for me, which are the excessively high Gas Fees associated with creating NFTs.
Gas Fees are essentially the fee you pay to process a transaction, such as minting (or creating) an NFT. I had to put a hold on building up my digital art NFT portfolio because minting required $40 per image (or in some cases, even double or triple that) in Gas Fees.

And forget about buying any NFTs from other artists. I’m sure I’m not the only one who doesn’t want to pay more in gas fees than the retail price of the artwork.
Unfortunately, a lot of people who just want to buy or sell affordable NFTs without so many zeros in the price have been excluded from the market due to the influence of the price of Ethereum and the resulting gas fees, which only get higher when the Ethereum network becomes congested.
Pastel aims to make minting an NFT on their network much more affordable and practical. Somewhere between 5 cents to 50 cents per image.
The fees are balanced automatically by the network, so that unlike Ethereum, even during high levels of network activity or interest in the PSL token, the transaction fees scale in proportion. For example, if the network difficulty were increased by 10x, the cost of minting would decrease to 1/10th.
As I just mentioned, I had to spend $40 in Ether just to mint a single piece of artwork on the Ethereum network, so a fee of less than a dollar per image is more than reasonable. Had I waited a few more months, I could have spent the money I used to mint one image in Ethereum to mint much of my portfolio on the Pastel network.
There are also benefits like file storage that you are paying for when you register an asset on the Pastel network, but we’ll come back to that.
Blockchain Security
My goal is to try not to get too technical about what I’m discussing in this review, but we do need to at least get an idea of the inner workings of a blockchain to explain the benefits that are specific to artists.
Much like an art museum, which relies on security guards, alarms and cameras to protect its assets, blockchains also need to be secured 24/7. Just like a burglar can break into a gallery and steal from or vandalize it, a hacker could disrupt a blockchain as well.
While blockchains are developed with security in mind, they are not all equal. The Pastel blockchain relies on multiple Supernodes to: provide additional security for the network, register and store NFTs, authenticate users, process transactions, and perform other essential tasks.

Anyone with the means to can operate a supernode without the reliance of any third party, and even make a profit for their efforts. But unlike an art museum, no one person, organization or government has ownership of the blockchain.
Though the supernodes facilitate essential NFT related tasks, they do not own the network. The Pastel protocol always requires that multiple, randomly selected nodes perform the work. These nodes work independently to reach a secure consensus, and supernodes even periodically challenge one another to prove that they are storing the correct information.
So then who owns the Pastel network? No one. That’s the cool thing about it, it’s self-sustaining. Who owns the lake? The fish? The water? The algae? The earth? Metaphorically, it makes sense: Anyone who participates in the Pastel network can benefit from it, but unlike a lake, no one can take possession of it.
It really is sort of an ecosystem: Creators have a purpose-built platform that enables them to generate income from their NFTs, the operators of supernodes earn something for processing the transactions and storing NFTs, and a portion of the transaction fees sustain all of the necessary support functions to keep the decentralized network operational.
Pastel even supports the development of third party applications on top of the Pastel network to encourage collaboration.
The PSL Token
While many applications for NFT creation run on Ethereum. Pastel runs on the proprietary PSL token, since it is its own blockchain. At its core, the PSL token is based on Bitcoin, which means that it works in a similar way: PSL is a store of value that can be used for transactions or transferred to other users. It also utilizes some of the privacy and security benefits of Zcash.

Just like other cryptocurrencies, PSL can be converted to other tokens or fiat currency on an exchange. You can even earn royalties from future sales of your work. Right now, the limit is up to 10%. Personally, I think this should be higher, but 10% is better than no royalty option at all.
In terms of accessibility, you can add PSL to your wallet using a variety of methods rather than relying solely on something like Metamask.

But what really makes the PSL token special is that it enables users to securely register and store their NFTs on the Pastel Network. I’ll explain more about that later in this review.

The Pastel network also includes a deflationary mechanism whereby a small amount of PSL is burned or spent by users during regular activity on the network. For example, it will cost you 1,000 PSL to create a PastelID to register your signature on the network. (At the time of publishing this review 1,000 PSL is worth around $4 USD.) Those tokens are burned or made unspendable to control inflation.
There are other activities performed by supernodes, buyers and sellers, which contribute to the burning of PSL tokens as well.
Environmental Impact of Digital Art NFTs
For those buyers and sellers who are concerned about the environmental impact of creating and selling NFTs, you may be relieved to know that Pastel is built with efficiency and long-term scalability in mind.
And to offset carbon emissions related to cryptocurrency, a percentage of every registration fee is donated to a non-profit that plants new trees.
So now that we’ve covered some of the technical stuff, let’s discuss the benefits of Pastel and how they might be useful for artists.
Integrity of NFTs Over Time
Both buyers and sellers of NFTs can agree that a digital asset should last (theoretically) forever and shouldn’t simply vanish or become inaccessible. If you think those NFTs you bought or sold are stored on some proprietary network that will host the images for all eternity, you may be surprised to learn that in most cases, you only own the token. — The actual digital asset may be stored on a third party cloud service hosted by Google or Amazon.
That means if the company hosting the file shuts down, or the links to your asset become inaccessible, so does the ability to retrieve the actual substance of an NFT, and you are just left with a dead (but provably-rare) link.

Nearly every NFT project misses this very important aspect of digital assets: they need to be stored and preserved in a sustainable and reliable way for a long, long time, otherwise what is the point in purchasing a digital painting over a physical print?
Pastel aims to solve this problem by storing, not just the token, but the entire digital asset in the Pastel blockchain. This truly distributed storage system enables a digital painting to be broken up into random chunks and shared across the supernodes on the Pastel network. As long as there are Pastel supernodes in operation, the artwork or asset can always be accessed by its owner.
Even if there was a global disaster and 95% of all nodes went down, you could still recover the file from the remaining nodes.
Authenticity
Another concern that creators and collectors have in common is the authenticity of NFTs. Online impersonation is a real threat, which creates a lot of anxiety in creators who are worried that someone will steal their work.
Furthermore, counterfeiting discourages collectors from purchasing work because, although some NFT marketplaces offer Verification Badges, an artist may require a significant online following to even be considered for a review.
Pastel addresses digital asset authenticity by allowing creators to establish a unique identity on the decentralized Pastel network. Only the creator’s private key can be used to validate transactions, and anyone can check to see if an NFT is digitally signed by the true artist, rather than an impostor.
By sharing their Pastel ID, a creator can alleviate some of the concern their patrons may have surrounding the authenticity of their work.
Near-Duplicate Detection
But what if someone takes your digital artwork and reuploads a copy of it to sell as a counterfeit NFT? What if they tweak your work a bit first?
Pastel has a really impressive way of dealing with duplicate or even near-duplicate artwork, and is the only NFT platform I have seen even trying to tackle this problem.

When an image is validated on the network, it is assigned a unique fingerprint which encompasses not only the original image, but also a series of AI Machine Learning simulations showing how the image may look when color corrected, warped, flipped, cropped, etcetera. Not only does that highlight how lazy counterfeiters are, but it’s also really clever.

What’s also remarkable is that the Pastel network can assign a level of rareness to the image data of each new NFT. It compares it to all existing NFTs on the network, to NFTs on comparable platforms like OpenSea, and even all of the open database of images on the internet. Think of it like a really neat reverse image search on Google.
If the asset has been signed and is not significantly similar to any other image on the Pastel network, then it earns the special designation of Rare to Pastel. This gives buyers a level of confidence that they are buying an original and not a counterfeit.
If the image asset is truly unique and cannot even be found in external sources like Google Search, then it is designated as New to the Internet. This is a way to certify that the NFT you are selling is truly rare and, prior to certification, has never been seen on the internet.
While the previous level of authenticity may suffice for the casual NFT collector, New to the Internet is more geared toward buyers who are interested in purchasing a work because it is exceptionally rare.
NSFW Detection
In addition to validating that images uploaded to the Pastel network are not duplicates, files are also scanned by supernodes for imagery that is Not Safe For Work. If that’s what you want to upload, go for it. The Pastel network allows NSFW content — in fact it’s permissionless to register an asset — but it will designate NSFW images accordingly so that buyers can browse the market without seeing anything they might find offensive.

Just as well, operators of Supernodes can choose which image settings they want to support, with the option to opt out of hosting NSFW files of various types or altogether.
Conclusion
OK. I’m impressed. I went from being excited about NFTs, to disappointed, to excited again. What Pastel aims to do really does alleviate a lot of the concerns that I have about taking the next step with NFTs.
And I know a lot of people who want to purchase NFTs will appreciate the guidance and authentication features offered by the Pastel network. All of this helps to establish confidence in the NFT marketplace.

Pastel’s borderless currency and low price point for entry makes it significantly easier for the average artist to start selling NFTs. It also removes many of the barriers for buyers which encourages more collectors to become both comfortable and capable of buying an NFT.

The Pastel team is managed by developers, cryptographers, technologists and many other talented people. It is decentralized, so no underlying stakeholder or individual owns more than 5% of the total supply of PSL tokens.
Pastel’s founder is Jeff Emanuel, who is an aspiring digital artist among other things. He and I share the desire to solve some of the obstacles that stand in the way of artists, both traditional and digital.
The Pastel team believes that rare digital assets are important enough of an application to merit their own, purpose-built system. And I couldn’t agree more.
The Pastel network is live and builders can start developing really cool things like their own platforms directly on top of Pastel today.

Pastel will also be launching its own marketplace on the network early next month. I’ll be making a follow up video demonstrating how to use the network to create, buy, trade and sell digital art NFTs so be sure to subscribe to my YouTube channel if you don’t want to miss that video.
That brings us to the end of my review of the Pastel network. I’ve greatly simplified what Pastel can do, so if you are interested in learning more about the project, check out their website at pastel.network, follow them on social media and subscribe to their YouTube channel.
Corel Painter 2022 Webinar

Create next-level art with top secret Painter tips
In this webinar, Aaron Rutten reveals art creation game changers! Instantly change brush appearance, access favorites, and mix media in exciting ways for revolutionary end results.
What you will learn:
- Easily find and save favorite brushes
- Change brush size and appearance with one click
- Simply deal with layer functions
- Improve your painting speed
Level-Up Your Art Skills
Master digital painting with my video training courses for Corel Painter
Corel Painter Training
Learn how to use the Corel Painter application to make digital art
Landscape Painting
Discover how to paint a variety of landscapes
Digital Art Skills
Improve your basic digital art skills
Corel Painter 2022 Review

In this review of Corel Painter 2022, I’ll demonstrate how I use some of the top features in my workflow and I’ll share my overall opinion of the software.
This is not a sponsored review, but I did receive Corel Painter 2022 for free. I may earn commissions from purchases made through affiliate links in this article. All opinions in this review are my own.
Pros:
- Captured Dabs can be changed on-the-fly
- Grayscale preview in the Navigator Panel
- Enhanced Cover Method offers improved brush performance
Cons:
- Major changes to Brush Library may take getting used to
Captured Dabs Library

In my workspace, I’ve created a new “Dabs” Palette Drawer which has the new Captured Library, Apply Dab Profile property, and Hardness slider. Add to this the Dab Preview panel, and this combination of controls lets me easily edit the shape of my dabs.
The ability to change dabs on-the-fly makes it incredibly easy to randomize the shape of your brush. For example, whenever I’m painting foliage, I can simply change the dab shape to get different tree effects without having to switch between a bunch of different variants.
Or I can easily paint a custom dab and then capture it right into the Captured Library without a lot of hassle.
Managing dabs has never been easier with the new ability to sort and export Dab Libraries.
And here’s a hidden gem: You can even drag these dabs into a custom palette, if you don’t want the bulk of the entire Captured Dab library in your workspace.

Clear Layer
I’d have to admit, the feature that I use the most in Painter 2022 is one of the simplest: Pressing “Delete” will now clear the contents of a layer. I use this all the time and I love it. It even works on multiple layers.
Corel Painter 2022 Brush Library
One of the changes that I have sort of a love/hate relationship with is the reorganizing and renaming of the brush categories and variants. While I do appreciate the logic behind the changes, it makes my life more difficult as a Painter instructor.
For example, I have loads of tutorials directing people to use the Diffuse Blur brush, but now it’s called Blur Diffuser. Might that cause confusion? Perhaps for some.
A few of the brush categories have also been renamed. You’ll find there are a lot of brush names that are identical to each other, and you’re supposed to infer the differences from the brush category.
This single change to the Brush Library is going to have the most impact on Painter artists and it’s going to take the most adjusting to.
Once you get past the unfamiliarity, hopefully you’ll find it easier to locate brushes.

I do like that there are more Brush Categories. — I think that makes it easier to find the brush you are looking for. The Filters really help to narrow down the results.
I also like the way the categories are grouped together. For example, the Oils are all next to each other, as are the Watercolors.
Grayscale Preview in Navigator
The next feature I’m using often is the Grayscale Preview in the Navigator. Because it’s buried in the Navigator Options, I’ve made a shortcut button for it in my workspace.
If you have an extra display, you may want to move the Navigator onto it so you can get a larger view. This will give you a clearer representation of the contrast in your painting.

While it’s useful to view the Navigator in grayscale, it’s also nice to have apply a grayscale preview to your canvas as well. While you cannot do this in Painter, there are ways to achieve the effect with Windows 10 Color Filters, or through your Display or Video Card Control Panels on both Windows and Mac.
Enhanced Static Bristle
Static Bristle brushes have been updated to take advantage of Rotation and Squeeze. If you are using Pen Tilt or Rotation, you can create stroke that are more dynamic. This adds a lot of randomization and character to this brush technology.
Although Static Bristle is not my favorite bristle simulation, I did stumble upon a combination of settings that produces a really nice pixel spray effect. I like this better than the default Pixel Spray brush because it doesn’t spray at an angle.
I bet with some more experimentation, more types of effects can be achieved with Static Bristle. Especially when combined with the Enhanced Cover Method.
It’s fun to see an older brush technology learn new tricks.
“Enhanced Cover” Method
Going back to teaching old brushes new tricks, the Enhanced Cover Method allows you to modernize some of the older cover brushes. In addition to faster performance and more accurate color blending, you can also add anti-aliasing to the dabs.
In my opinion, all of your Legacy Cover brushes should be converted to Enhanced Cover, unless you prefer the look of the older Method.
Performance
While we’re on the topic of performance, Painter 2022 should feel faster overall when you are using Enhanced Cover brushes, as long as your GPU is able to experience the up to 75x boost. (My Nvidia GTX 1080 is able to get 74-75x.)
When you are using Impasto on Default and Thick Paint Layers, you’ll see a slight bump in performance too.

If your computer hardware is forcing you to work on smaller canvases, check out my video about upscaling with Adobe Super Resolution. Your mind will be blown.
Jitter Reduction
Another feature that I use often is Jitter Reduction. This property adds stabilization to your strokes without adding as much lag as the Stabilization property (formerly known as Damping).
Anti-aliasing
To create brushes with an anti-aliased edge, I can use the new Hardness slider and modify the Dab Profile.

Isolate Layer Visibility
Next, I’ll show you a few Layers features that I like. You can now Alt or Option click on a layer’s visibility icon to isolate it from the other layers visually. Anyone who has ever struggled to find a layer in a complex composition will love this feature.

Multiple Actions on Layers
Small, repetitive actions can amount to a lot of time wasted. So I’m pleased that you can now lock, move and convert multiple layers at once.
Moving Selection Moves Pixels
The Layer Floating Object, a remnant from an ancient version of Painter, has been replaced by the enhanced Layer Adjuster behavior. You can now move a selection and the contents will move along with it. This is what you’re used to, if you work outside of Painter.

Color Dodge & Burn for Glazing
Though I didn’t think I’d find much use for it beyond image compositing, I found that Color Burn works especially well for glazing without muddying up colors. And Color Dodge gives some interesting lighting effects. These are welcome additions to the Composite Methods and Merge Modes.
Watercolor Mixed-Media
The final new feature in Painter 2022 that I use in my workflow is the ability to mix watercolor with other types of media.
For example, I can paint with chalk on a Watercolor Layer and then wet it down to make it run with a watercolor brush. =’
Just a Filter to find brushes that are compatible with Watercolor.

One of the best blenders for watercolor is the Just Add Water brush. Now you can use it to blend watercolor without having to convert the layer to default.
Watercolor has always been difficult for me to work with in Painter because of all of its limitations, so I’m excited to see some of those constraints were eliminated.
Conclusion
Overall, I’m happy with the changes to Painter 2022. This is another version that focuses heavily on making Painter easier to use by squashing legacy bugs and making the application more modern.
There aren’t any new, revolutionary brush technologies to play with — as we saw with Thick Paint in Painter 2018 — but the enhanced Dab shaping and Enhanced Cover performance are able to unlock more of the potential of pre-existing brush technologies.
Of course, Painter 2022 is a bit faster which is nice. Assuming your computer specs are capable of leveraging the brush acceleration features.
A lot of attention has also gone into implementing feedback from the Painter Community. Many of the changes in Painter 2022 are relatively minor, but their effects really add up to create a substantial impact. Needless to say, there’s a lot of features I didn’t mention that add even more value to this version.
The cons are that many of you are going to have trouble making sense of all of the changes to the Brush Library. This also affects me because it creates some inconsistency in my past lessons.
Fortunately, I have a solution that suits both of our needs and that is my Corel Painter 2022 Training Course. This in-depth course covers all of the changes to Painter 2022 and then some. It’s one of the best ways to master Corel Painter.

Don’t have Corel Painter 2022? You can save $100 off the full version with my coupon code PTRAR at checkout on painterartist.com

⭐ Watch Corel Painter tutorials on my YouTube channel


Corel Painter 2022 Course

Learn how to master Corel Painter 2022 with Downloadable Video Lessons
In this course, Painter Master Aaron Rutten guides you through all of the important tools and features of Corel Painter 2022 while teaching you many of the digital painting tricks and techniques he has learned throughout his career.
In addition to discovering Painter’s essential content and features, you’ll also learn essential illustration skills that you can use to create art like a pro.
This Corel Painter 2022 course is suitable for beginners and intermediate Painter users who want a comprehensive guide through Painter’s content and features. After this course, you’ll be more confident using Painter’s interface and tools.
| Skill Level: Everyone |
| Compatibility: Windows & Mac |
| Course Length: 17.75 Hours |
| Video Quality: 1440p & 1080p |
| Resource Files: Workspace, Brushes, Reference PDFs and more |
| Access: Download or Stream |
Free Sample Lessons
These sample videos will give you an idea of the quality this course offers.
(Some sample videos will be available as they are released over the next few months.)
Learn more about Corel Painter with my free tutorials and paid courses.
Corel Painter Essentials 8 Course

Learn how to master Painter Essentials 8 with Downloadable Video Lessons
In this course, Painter Master Aaron Rutten guides you through all of the important tools and features of Corel Painter Essentials 8 while teaching you many of the digital painting tricks and techniques he has learned throughout his career. In addition to discovering Painter’s content and features, you’ll also learn fundamental illustration skills that you can use to create art like a pro.
This Corel Painter Essentials 8 course is suitable for beginners and intermediate Painter users who want a comprehensive review of Painter’s content and features. After this course, you’ll be more confident using Painter’s interface and tools.
| Skill Level: Everyone |
| Compatibility: Windows & Mac |
| Course Length: 3 Hours |
| Video Quality: 1440p & 1080p |
| Resource Files: Templates and artwork to follow along with |
| Access: Download or Stream |
You may be able to learn more about Corel Painter Essentials with my courses for the full version of Corel Painter.
How to Make an NFT of Your Digital Art


What is an NFT?
Crypto Art, or NFT Art, is artwork that has been turned into a collectible on the blockchain. Without getting too technical, NFTs are a recent technological advancement that solves the problem of selling original digital art by allowing buyers to have a unique proof of purchase. You could download my low-res preview from the listing page, but it would be worth nothing. The NFT is worth whatever people are willing to pay to own it, just like a traditional painting or a limited edition print.
Should the creator choose to, they can also allow buyers to resell the crypto artwork, so NFT paintings could be an investment that makes a profit for the buyer.
You could also think of NFTs as a way to support the creators you love. Rather than buying a print or joining an artist’s Patreon, you could buy one of their NFTs.
How to Buy an NFT
There is a bit of a learning curve to buying and selling NFTs, but it’s not too hard. For those of you who may be interested in purchasing this painting, you’d need to: Download a wallet app like Coinbase Wallet, purchase some Ethereum with your native currency, and then link your wallet to Rarible by scanning a QR code with your phone. It sounds like a lot, but each app guides you through the steps.

I’ve just started my own Crypto Art collection and my first NFT is for sale on Rarible.
You can make an offer or buy one of (3) limited edition images which include a printable hi-res copy and the Photoshop PSD with layers.
How to Sell an NFT
If you’re looking to create your own NFTs, I’d recommend rarible or mintable. Mintable has a free option, but I liked Rarible’s process better, so I paid a bit to mint my NFTs. Yes, there is some cost involved, but it’s comparable to investing in prints and frames to sell a piece. Opeansea.io is also great and can index your NFTs from other websites.
Each website will walk your through the process, but essentially, you add the artwork files to a listing, enter information like a price and description, and then you pay in Ethereum to mint the item into a collectible on the blockchain. It’s best to do this when there is less congestion, otherwise the fee to mint an NFT can be higher than necessary.
Once minted, you can sell or gift the NFT artwork and it can continue to be resold on the public market. The minted artwork exists inside your crypto wallet until you sell or transfer it to a buyer’s wallet after a payment has been agreed upon. Each website offers different pricing models, but many offer Buy It Now as well as an auction feature.
Aside from losing the money/Ethereum you paid to mint the artwork, you aren’t committed to anything. If you create an NFT and then decide that you want to change the price or delete it, you can do that. However, if a buyer purchases one of your NFTs, they own it for life.
It’s also worth pointing out that the value of Ethereum changes constantly, so the value of your artwork is linked to that as well. For example, 1 Ethereum might be worth $1,800 one day and $1,700 the next. If you’re selling an NFT for 1 Ethereum, then the price of your artwork fluctuates over time.
This could be the future of digital art, so I’m excited to see how it works out.
For a more detailed tutorial on creating an NFT, watch my YouTube video:
DISCLAIMER: This is not a sponsored post, but if you sign up for Coinbase using my affiliate link, I will earn free Bitcoin. You can also earn free Bitcoin by buying or selling $100 or more of crypto.
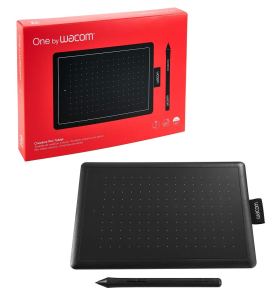
Wacom One Review – Affordable Display Tablet

The Wacom One is Wacom’s most affordable display tablet to date. This Wacom One review will be presented from a digital artist’s perspective.
Quick disclaimer: This is not a sponsored video, but Wacom did send me this tablet unconditionally to review as I please. As always, all opinions in this review are my own. I may earn commission from purchases made through affiliate links in this article.

Now if the name Wacom One sounds familiar, you’re not the only one. (See what I did there?) There is also the One by Wacom which is a non-display tablet, potentially adding some confusion for those of you who are searching for these devices online.
Repeating names for multiple products seems to happen a lot at Wacom. And although it’s confusing, my guess is that perhaps there has to be some benefit to doing it this way. Personally, I would have called it Wacom Two, but I digress.
In 2019 Wacom released the Cintiq 16 which was a more budget-friendly display tablet, but now in 2020 we see the price being lowered even more for a Wacom-quality display tablet. This is great news for artists who really want to draw directly onto a screen, but don’t have a whole lot of money to invest in the professional-level features that often accompany display tablets.
The Wacom One is lean and mean. It has the essentials you need to make digital art and not much else. So let’s dive into this device and take a look at some of the specs. I’ll also do some painting on this device so you can see how it performs.
Specs & Features

Screen
The screen measures 11.6 inch wide by 6.5 inches tall. It’s 13.3 inches diagonally. The screen resolution is 1920×1080, and the color gamut is 72% of NTSC, which is a little over 70% Adobe RGB, or around 93% of sRGB. So it’s not the best screen in terms of clarity or color accuracy but it will do the trick.

The Wacom One is using an AHVA display with a Wacom EMR digitizer like you might see in a tablet like the Samsung Galaxy Note.
There is no touch capability. I wouldn’t even bother trying. And there is a matte anti-glare film applied to the tablet. The film is applied very well without any bubbles or edges peeling off.

One really cool feature is that there’s virtually no bezel to interrupt your pen if you make a stroke that goes off of the active area. The bezel will catch your pen slightly at the very edge of the tablet, but there’s a pretty decent buffer zone before your pen hits that edge. The bezel design of the Wacom One is much closer to the Cintiq Pro models, which I like.
Pen
Now let’s discuss the pen. The pen has over 4000 pressure levels which is more than adequate for drawing and painting. The pen resolution is 2540 LPI.

Pen Tilt is supported which is great. You can use Pen Tilt to change the angle of your brush dab or to shade with the side of your pencil.

Wacom’s pen does not require a battery or charging and it performs much better than non-Wacom pens. Even with the more budget minded tablets Wacom is offering, you’re still getting a top-of-the-line pen experience.
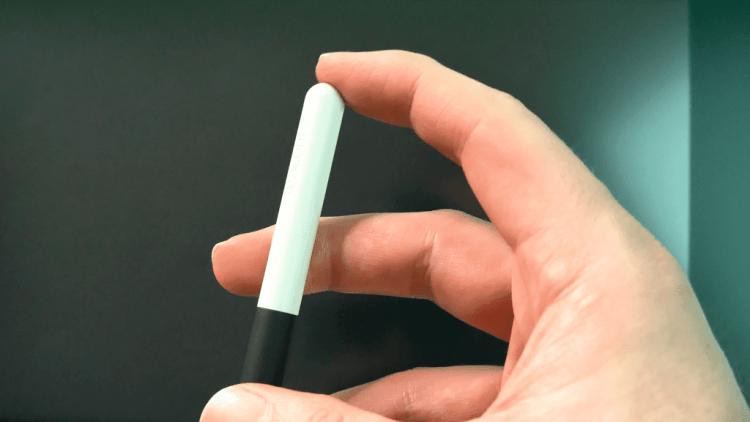
The pen is lighter and smaller than the Pro Pens and similar in look and feel to the one that comes with the Intuos. The pen only has one button rather than two, and it does not have an eraser.

There are three spare nibs hiding behind the legs.
As far as using other pens on the Wacom One, the Wacom One does not support other Wacom pens like the Art Pen or the Pro Pen 2. But it does support other types of EMR pens. I have this STAEDTLER Noris digital pen which looks a lot like a pencil and it works great on the Wacom One. I can even vary the width of my line by pressing harder or lighter. There are a few other pens that are supported and more pen brands will be added in the future.

Now if I do some quick line tests, the line quality is great, it’s very smooth, there’s no significant line jitter. Even if I’m doing diagonal lines, there’s virtually no parallax or offset to the cursor.
The line tests with the Staedtler Pencil are great too. I notice that the Staedtler Pencil grips the surface more. I prefer the feel of the Wacom pen, but the Staedtler Pencil could be a nice option perhaps for note taking or sketching. Having a button on the pen is definitely useful too.

Build Quality
Now let’s move on to discuss the build quality of the Wacom One. The device itself is 8.9 inches by 14.1 inches with a thickness of 0.6 inches. It’s very lightweight at only 2.2 pounds.
The stand is built in to the tablet. There are two legs that fold out to bring the tablet to an angle of 19 degrees. The legs are surrounded by a rubber grip, and the bottom edges of the tablet have rubber grip as well. This means that whether the legs are extended or the tablet is laying flat, it won’t slide around when you draw on it.

There are no external express keys on the Wacom One, but you can get the optional Express Key Remote if you like.

There’s a nice fabric pen holder in the top center. You just slide your pen in and out of this. As far as the screen temperature I didn’t notice any warmth.
The edges and the back of the tablet are kind of an off-white color.

The Wacom One comes with a one year warranty and I’d say the build quality feels great. The tablet does not flex much when you’re bending it and the edges are smooth and rounded. Overall I’d say the thickness is closer to the Intuos Pro or the Intuos 2019. And I can’t help but notice that the Wacom One is kind of similar in design to the XP-Pen 15.6 Pro, but without the external buttons.
Compatibility
Now let’s discuss compatibility. The Wacom One requires an HDMI video connection and a standard USB-A port for the data connection. The USB-C, USB-A, HDMI and power are all combined into an X cable. The power end of the connector is a USB-A connection which plugs into this AC power adapter and this adapter can be converted for different outlet types and then the USB-C cable connects to the tablet.


The Wacom One is compatible with PC and Mac and it requires Windows 7 or later, or Mac OS 10.13 or later. And just for clarity, there is not a built-in computer in the Wacom One. It must be connected to a Windows, Mac or a compatible Android device such as the Samsung, Galaxy S8, S10+, and some of the Samsung Galaxy Notes as well as some other types of phones.
Connecting to Android
Now in order to connect the Wacom One to a compatible Android device, you’re going to need either Wacom’s adapter (which is not included), or a USB-C mini hub. Once you’ve connected the Wacom One to your Android device you can open the Samsung Desktop if you’re using a Samsung device, which expands to fill the active area of the tablet and you can draw just like you could on a desktop computer. It’s not like the Intuos Android that I reviewed recently, where only part of the tablet can be drawn on and it only works as a mouse cursor on your phone. — This here is legit. A phone or tablet could legitimately replace your desktop or laptop workstation for creating basic digital art.
Installation & Software
Now let’s discuss installation and software. Installation was very easy to set up. All I needed to do was plug the tablet in and install the driver and it worked. I didn’t have any driver issues.
I can use the Wacom control panel to customize the pen button for each app individually or globally for all apps. And there’s lots of other options you can tinker with.
Bundled Software
The Wacom One also comes with some bundled software. The software’s only available for Windows 10. There’s Bamboo Paper which is a note taking app. There’s Clip Studio Paint Pro which offers you a free license for up to six months. (This is a great digital drawing and painting application.)
You can also get Adobe Premiere Rush which is kind of a simplified video editing application. This is very useful for doing video editing on the go if you’re doing vlogs and travel videos and things like that.
Adobe Fresco is coming soon. They’re offering six months license but as of the making of this video it’s not available quite yet. And even if you don’t like that bundled software you can get lots of great free alternatives such as Krita.

What Can You Do With It?
So what can you do with the Wacom One? You can take notes, you can edit photos, you could edit videos, you could of course do some light drawing and painting on this device, you could do graphic design and more.

A couple of features that I think are cool is that this tablet can be powered by portable battery bank or a desktop or laptop via USB. You’ll of course need two USB ports, one for data and one for power. But it’s neat to see that you can use this thing without having to plug it into a wall.
You can also use the Wacom One as a portable monitor through HDMI. So for example you might want to use a monitor to preview your video recordings or your photography.
Who Is This For?
So who is the Wacom One for? The Wacom One is a great starter display tablet for beginners or younger artists with smaller hands who may also want to move their tablet between rooms or maybe even take it to school.
Android compatibility means the Wacom One might even be a good tablet for photographers who shoot on their phones to do some editing on the go. And with the bundled Premiere Rush software, vloggers can even edit their videos and view them on a larger screen without having to lug around a laptop. Best of all Premiere Rush syncs with the desktop version through the cloud.
It also feels great for note taking. If you wanted to create video tutorials where you write out math equations, you could do that with the Wacom One. If you’re a college student, you can connect it to your phone and use it to take notes during lectures. And I have to say, handwriting on the Wacom One felt really natural while using the Staedtler Pencil.
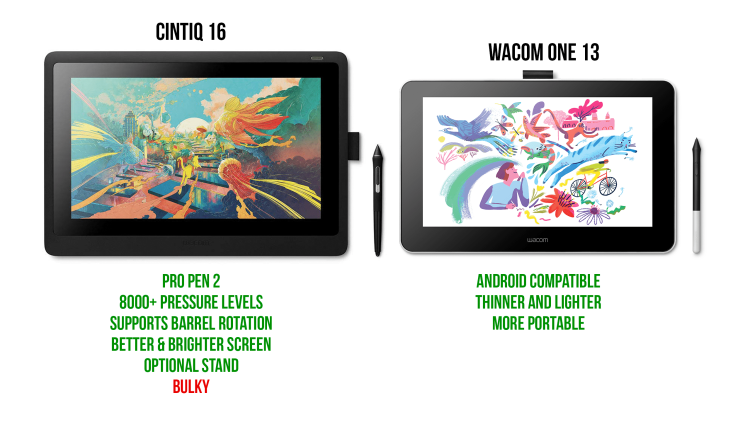
Comparisons
And now for some comparisons. Should you get the Wacom One or the Cintiq 16 which is a bit more expensive?
The Cintiq 16 offers a better pen, it has a better display that is a bit brighter, its drawing area is of course a bit larger, it has an option for an attachable and adjustable stand and the Cintiq 16 is compatible with the Art Pen which can sense rotation and other types of Wacom pens. However, the Wacom One is definitely thinner, lighter and more portable, especially if you’re planning to work primarily on a compatible phone or tablet. The Cintiq 16 with the stand attached can be quite bulky.
The Wacom One is also a more-affordable alternative to the Intuos Pro, if you don’t mind trading some of the pro-level features for a display that you can draw directly onto.

Price
And now for the price. The Wacom One sells for $399. You can purchase the Wacom One through an online retailer like Best Buy, or Wacom’s website.
Show your appreciation for this review by becoming a Member of my YouTube channel.
Pros & Cons
So let’s talk about some pros and cons. The pros of the Wacom One are that it’s a very low-profile and lightweight device. It comes with limited bundled software. The Wacom One offers excellent pen quality that’s only exceeded by Wacom’s Pro Pens. The Wacom One supports other types of EMR Pens which is great. And it supports some Android devices.
And now for the cons. The Wacom One does not include the adapter to connect it to an Android device, but you may not need it, so I guess it does keep the cost down. Just be aware that the Wacom One only supports certain Android devices.
The Wacom One does not have any Express Keys and it does not support Multi-Touch, so that means you’re going to have to lug around a keyboard if you are planning on using this with a phone or tablet only.
Concerning the stand, 19 degrees is not the most comfortable angle to draw at. And there’s no way to adjust the angle to a more vertical orientation.
And then my last gripe is that the white color on the bottom of the tablet and the edges could collect stains over time. It could be dirt from your hand or it could be grime that’s on your desk.

Conclusion
And now for my conclusion: 2020 seems like it’s going to be the year that smartphones give desktop computers a run for their money in terms of being capable digital art workstations. Of course, phone hardware is nowhere near professional level, but for artists who are new to digital art, a phone is now a legit tool for making art.
I’m also happy to see Wacom offering an even more affordable display tablet because I believe non-display tablets are on their way out. It feels so much better to see what you’re drawing underneath your pen and I’m glad the Wacom One puts that experience within the reach of more artists.
Now I know there will be comments saying that there are Wacom alternatives that offer more for the same price. I feel like I’m beating a dead horse here, but I urge you to check out my comparison video of the XP-Pen Artist 15.6 Pro to a Wacom tablet, so you can get a feel for what the real differences are because tablets are more than just specs on a website.
For example, you certainly can get a pen with higher pressure levels, but if the pen doesn’t respond to light pressure, then what’s the point? Or you might get lines that are always wavy or have unexpected tapering when you choose a Wacom alternative. So please be #DigitalArtSmart and watch some reviews before you buy a tablet and don’t go off of specs alone.
Read more of my Drawing Tablet reviews on my website or check out my YouTube channel.